Creating Inspection Templates and importing items are powerful features in Builterra that help inspectors and project teams save time, reduce repetitive data entry, and maintain consistency across reports. This article walks you through creating templates in the Web Portal, syncing them to the Builterra Pro mobile app, and using both templates and the import function to quickly populate inspections. By mastering these tools, you’ll be able to streamline daily reporting, stay organized in the field, and focus more on site activities instead of manual data entry.
TABLE OF CONTENTS
- Preliminary Thoughts
- Creating Inspection Templates
- Syncing Changes to Mobile App
- Using the Import Function
- Applying Inspection Templates
- Submitting the Parent Inspection
- Inspecting Contract Items
- Final Thoughts
- Next steps
- Recommended Articles
Overview
This article discusses Builterra's Inspection Templates and import function, which enable users to expedite daily reporting. These features simplify data entry, reducing the time and effort typically needed. Builterra prioritizes design with customizable templates and smooth web-mobile integration, helping users stay organized and focused on project success amid industry changes.
Creating Inspection Templates
Builterra's Inspection Templates function streamlines daily reporting by enabling users to quickly generate standardized reports. With predefined templates, users can easily input data, saving time and ensuring consistency. This feature is especially beneficial for tasks involving repetitive entries, enhancing efficiency and accuracy while minimizing errors.
1. To initiate the process, navigate to the Builterra Inspect portal and locate the project you're currently working on.
2. By selecting the project name in the tree-view, access the project details editing page using the 'Red pencil' icon, granted sufficient permissions.

Using the Favorites function from our previous article, Favoriting Projects and Forms, will help you find your project if you are apart of many projects.
3. When you are in the Edit Project portal, navigate to the Project in the Tree View and head over to the Templates tab at the top of the screen.

Here, you will have the options to create a New Template or Duplicate previously created Templates. For this account there are currently no Templates created so we will be creating one.
4. Clicking on the Create New button will open a menu where you can choose from all the forms that are assigned to you.
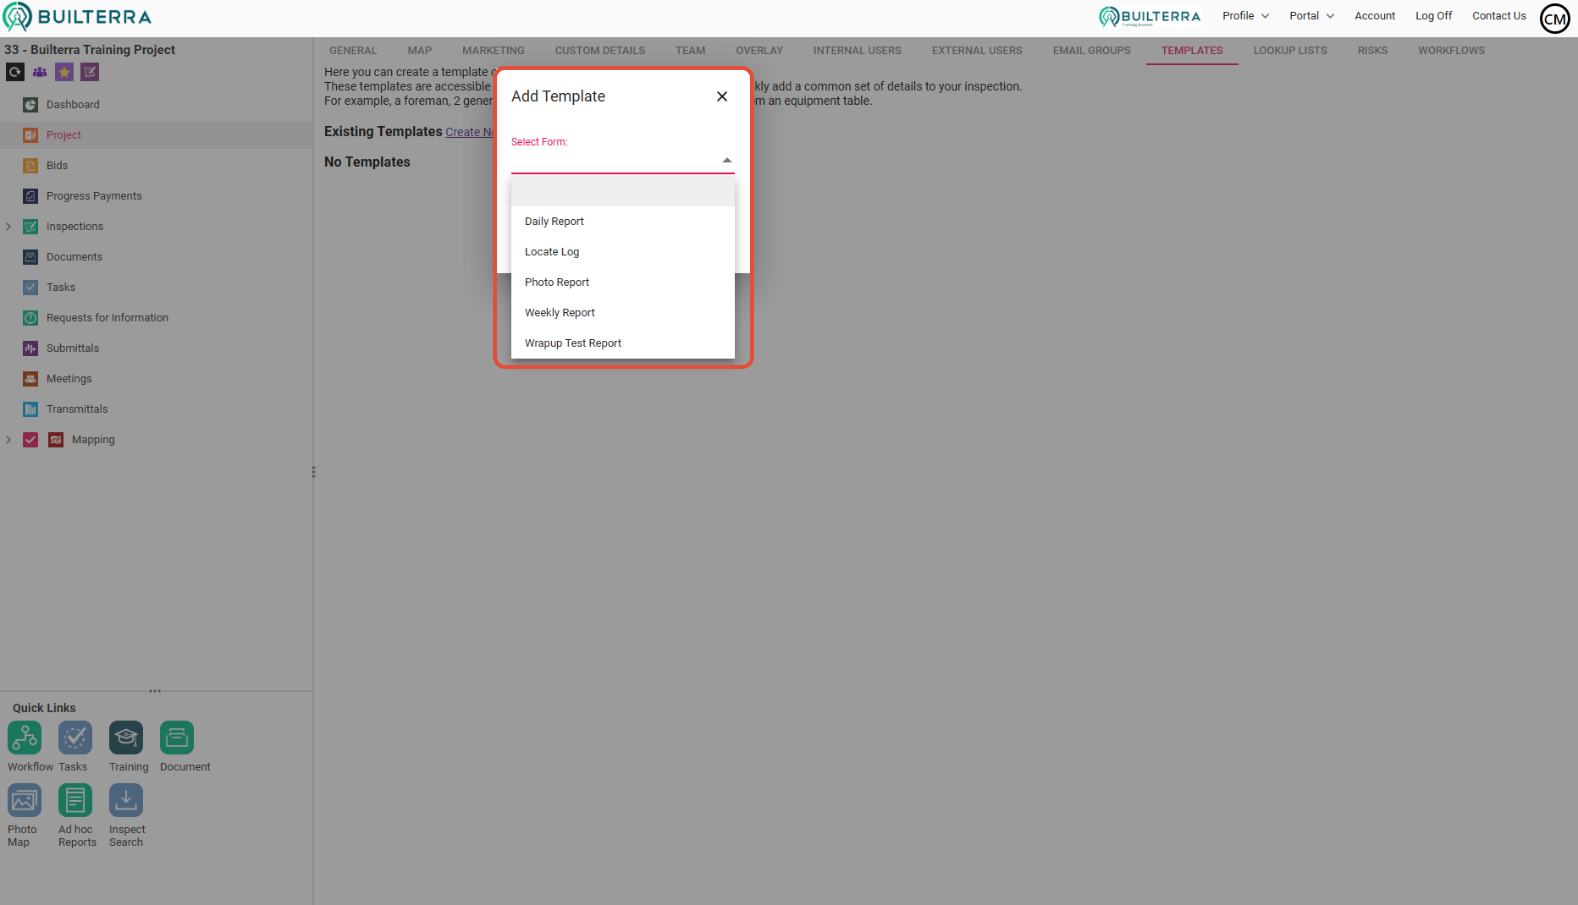
5. Once you have selected the form you wish to create the Template for, give it a name and click Create.

6. You should now see your template in the list. The options you are given are to Edit the template, duplicate the template, and delete the template.
7. Clicking on Edit Template will open up a new browser tab where you can add in equipment, labour, etc.
 General Tab General Tab |  Equipment Tab Equipment Tab |  Labour Tab Labour Tab |
Populating your Template
Populating a template is similar to adding items to your inspection report on the Web portal. The items that you should be adding to the template are the ones that you will often need to record on this project's job site, as the template is used for reoccurring inspection items to save time. For one-off or infrequent items, we suggest that the inspector adds them manually.
Below you can find the step-by-step guide to learn how to add an equipment item, however, the steps also apply to labour and remarks.

On the equipment tab, follow the steps below:
1. Click on the 'Add' button
2. Fill out the details of the equipment item
3. Click the 'ADD' button to add it to the template
4. Repeat these steps until all of your template items are added.
In my case, I already added 3 items before to demonstrate a few examples.
Syncing Changes to Mobile App
Manual Syncing: After making changes to templates, manually sync project data to the mobile app by tapping the menu and selecting the project. Syncing on the app ensures that it has the most recent information from the server. Syncing also works both ways. For example, if you submitted photos on the app, and you don't see them on the web portal, try syncing on the app. See if there are any photos stuck from submitting as a result of closing the app or phone. (for iPhones only)

Updating Information: Perform manual syncing to ensure the latest information, including newly created templates, is available on the mobile app.
Using the Import Function
Importing items from previous reports is just one of the many ways to speed up the inspection data-entry process. This gives you more time to observe what’s happening on-site and focus on the work being done — not on your phone trying to add inspection items into the app.
Follow the steps below to import previously submitted items in the mobile app:
 |  |  |
| Step 1: Tap on the menu button | Step 2: Select the type of item you want to import (e.g. Equipment) | Step 3: Select the items you want to import |
 |  | |
| Step 4: Tap on the Import Items button (this button changes based on the amount and type of item you're importing) | Step 5: Tap on the 'Yes' to confirm importing the items onto the report |
Selecting Import Options: Choose the type of information to copy, multi-select items, and refresh available items if needed.
Applying Inspection Templates
Inspection templates are a vital part of increasing the productivity for most inspectors, as they allow them to quickly add reoccurring inspection items like labour and equipment to the report. This feature is similar to the import function but allows the PMs and admins to pre-configure reoccurring inspection items.
Follow the steps below to use the inspection template:
| pending | pending |
| Step 1: Under the Sub-inspections drop-down menu, select 'Template' | Step 2: Select the Template you wish to use in the list |
 |  |
| Step 3: Review and adjust the items before submitting them onto the report | Step 4: Tap on the 'Submit' button to add your items to the report |
Verifying Results: Review the PDF to ensure items from the template are successfully added to the report.
Final Thoughts
By leveraging Builterra's Inspection Templates and import function in the mobile app, construction professionals can significantly enhance efficiency in creating daily reports. These features streamline data entry, saving valuable time and effort in project management tasks. With customizable templates and seamless integration between web and mobile platforms, Builterra empowers users to stay organized and focused on project success.
If you prefer a more visual learning experience, check out our video based around creating templates in the web portal and importing those items on the mobile app
Next steps
- Customizing Builterra Pro Settings
- Creating Multi Visit Reports
- Let us know if this article was helpful below.
Recommended Articles
How to Create & Complete Mobile TasksHow do I Create a Multi Visit ReportHow do I Configure my Builterra Pro AppWas this article helpful?
That’s Great!
Thank you for your feedback
Sorry! We couldn't be helpful
Thank you for your feedback
Feedback sent
We appreciate your effort and will try to fix the article